ELT hardpoints, started pitot mount install | 12.24.2020
It's Christmas Eve and we had nothing planned except a lazy day around the house. While we relaxed all morning/mid-day, I worked on purchasing the switches, switch caps, fuse boxes, relays, etc for the electrical system. More details on that stuff as we hit that point. There's been a lot of "off blog" electrical/avionics planning, and all that stuff is coming soon, hopefully.
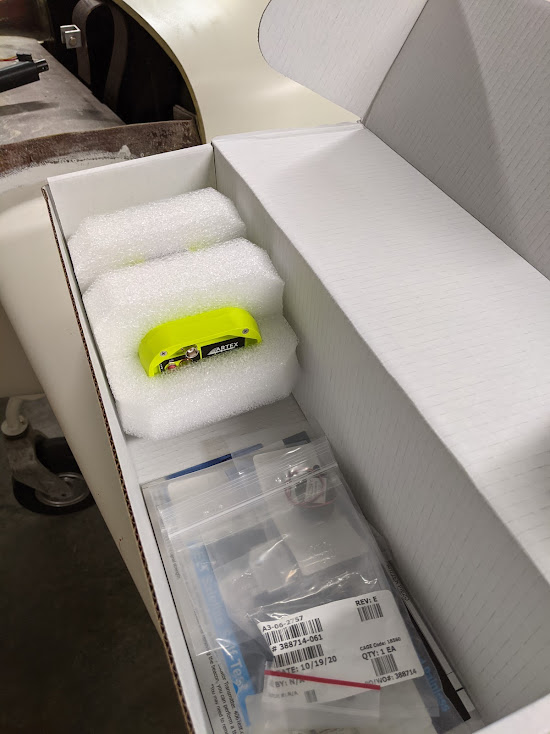
For actual work on the plane itself, I took it pretty easy. Started with the ELT hardpoints since our ELT came in and needs to be mounted.
For the non-pilot (family) readers, an Emergency Locator Transmitter (ELT) is a small(ish) box that is rigidly mounted to the airframe and has sensors inside to detect the forces of a crash. When a crash is detected, it broadcasts a signal (406MHz) that is monitored by satellites and can also be tracked by search and rescue teams from the air. The newer units that are monitored via satellite have an accuracy that can give an initial fix to within a 1-3 mile radius. When connected to a GPS source (ours will be), the initial fix is within 100 yards of the crash site. While unsettling to think about, they're required by regulation and provide a means to locate the aircraft in the worst case scenario.
 |
| Artex ELT 345 fresh outta the box. |
I started by drilling and tapping aluminum hardpoints out of some leftover aluminum scrap parts. These were then bolted to the steel ELT mounting plate.
 |
| Drilled, tapped, bolted, and the bolt ends covered with aluminum tape to keep the adhesive off the bolts. |
Once that was done, I mixed up some structural adhesive and mounted the tray behind the whale tail just in front of the gear bulkhead.
 |
| Smooshed in place. |
Once the adhesive cures, I'll pot and glass over the hardpoints with 2 plies BID, like I did with the autopilot hardpoints. Between the adhesive and the glass, they shouldn't go anywhere in the event of a crash.
After mounting the ELT tray, I moved on to prepping for the pitot tube install.
I have struggled for a long while on the mounting location for the pitot tube. The factory location is great, except that it's a side mount on the fuselage, and the AoA on the Garmin pitot tube wouldn't work. Additionally, the drain holes to drain any moisture/water out of the Garmin tube are on the bottom for a traditional mount. Theoretically if it got water in it, it wouldn't drain. After a suggestion from VOBA, I considered installing the Falcon 12-AN5812-2 pitot which has the drain holes on the sides, but at nearly $600 more than the Garmin probe, it just felt way too expensive. Additionally, I still wouldn't get AoA functionality.
That was until someone posted a picture of a pitot mounted under the fuselage near the gear doors:

That turned out to be Ron Jones' absolutely beautiful V-Twin. After gawking over his build website (seriously check it out), I figured I'd reach out to him and see how he likes that mounting location. Ron let me know that it's been working great for him and that he had gotten the thumbs up from Garmin's G3xpert support for the location. Ron was also nice enough to provide me with pictures and measurements from his plane's mounting location (thanks Ron!), and I moved forward with this install location. This allows me to use the cheaper Garmin probe, and hopefully get AoA to work, as long as I can calibrate it.
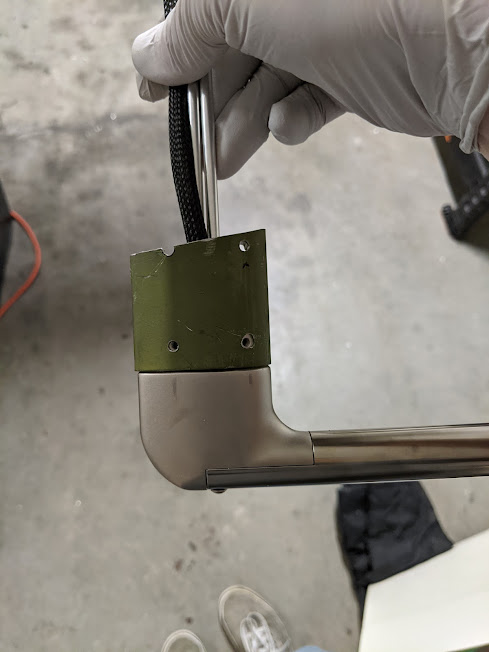
I had a leftover piece of AN5812 shaped tube from the Stabells when they had started their pitot mounting. Unfortunately, the holes didn't line up for the Garmin probe, so I had to re-drill them. This shouldn't be an issue, as the holes they drilled will be inside the fuselage.
 |
| Drilling new holes. My vice area is a *mess*. |
Once the mount was drilled, I used it to mark and drill the fuselage. Unfortunately, I can be an idiot sometimes, and I marked this backward. Measure once, cut twice....
 |
| Drilled holes. This was then cut out more with a milling type bit for the dremel. It's also backward... |
 |
| Angle cut pitot mount |
Next thing to do is buy some steel sheet that I can weld on top of this mount at the cut angle to create a mounting flange for the inside of the fuselage. This will give us something to adhere to when we mount this thing. It would probably adhere just fine without a flange using structural adhesive, but I really, *really* would prefer if this part doesn't depart the airframe in flight.
That's all for now!
- Jeff
Comments
Post a Comment